Category Archives: Appliances

Electric Hand and Stand Mixers

Electric Hand Mixers
I’m not really going to recommend one brand over another in this category, as I think most manufacturers make very similar product and since they aren’t built to last, I wouldn’t necessarily consider spending a ton of money on one, and a cheaper one like OsterBlack&Decker or Proctor Silex will probably do the trick. I will say that if you are spending more money on a more expensive brand name, that I don’t think it’s worth the extra money for anything over 7 speeds. I know a Cuisinart and Kitchen Aid both make 9-speed mixers these days, but most people don’t really use even the 7 speeds let alone 9, which gives you one lower and one higher speed to utilize.
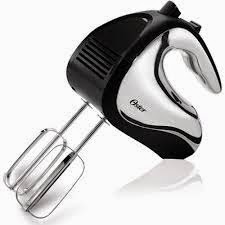
Oster hand mixer
Accessories for these also seem to be somewhat of a joke. Most folks who have gotten accessory pieces with their Kitchen Aid told me that they didn’t work well if at all, and if they did work, broke within a year (specifically, the whisk!). The motor on these isn’t really strong enough to handle dough, so having dough hooks for this might end up burning out your hand mixer. Don’t base your purchase off of the accessories you’re receiving as part of the “deal”!
I had this model and loved the storage feature!
Electric Stand Mixers
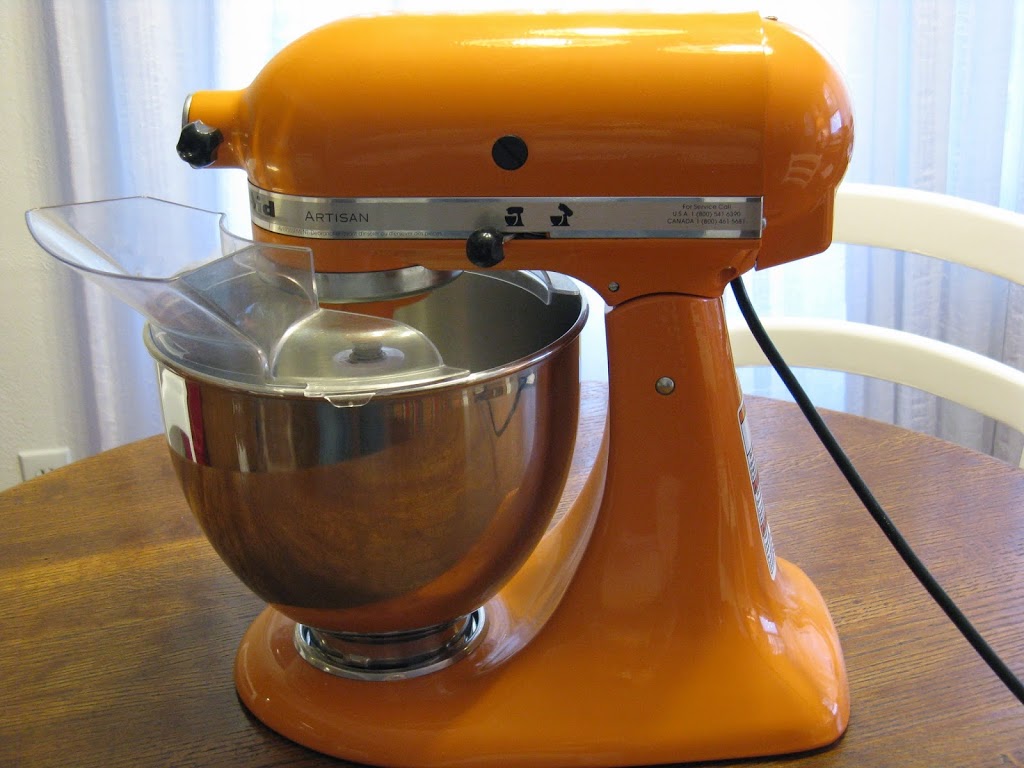
When you do find you need a little more power, it might be time to step up into a stand mixer. There are quite a few brands on the market so this can be a tricky item to shop for if you don’t know what you’re after. I personally only recommend Kitchen Aid’s stand mixer, and with that I also say anything less than a 5 quart/325 watt machine is not worth your money!! (There is a 4.5 quart tilt head stand mixer that has the same body as the 5 quart but a smaller motor and mixing bowl. This is usually the one you see at Bed, Bath & Beyond or Target.)
My beautiful tangerine 5 quart tilt head Kitchen Aid mixer!
If you’re spending the money, you at least want the power, and there are some basic cookie doughs that will really work your machine. Why worry about overburdening the machine when you don’t have to? Get the 325 watt and don’t worry about it!
These machines will tell you how much “flour power” they have (or for people like me, how many batches of cookies you can churn out!), so that might help you to determine what size fits your needs best. I would say that if you regularly only make single or double batches of baked goods the 5 quart should be large enough for you. If you are constantly making several huge batches of baked goods for your kids’ school or are running a very small business that requires a bit of baking you are probably leaning towards a 6 quart. (NOT a small bakery!! Commercial-grade, people.) Kitchen Aid’s 7 quart is newer to the market so I am hesitant to recommend it yet, as I normally say anything stronger than that you need to be looking at commercial mixers, like Kitchen Aid’s 8 quart.
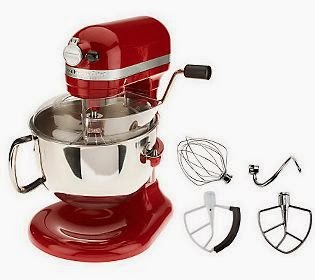
Kitchen Aid 6 quart bowl lift stand mixer
I prefer a tilt head, which you can only get on the 5 quart or smaller. The 6 quart comes with the “bowl lift” feature, which you can also find on different 5 quart models. I personally never feel like the bowl attaches properly with the bowl lift, so it doesn’t feel secure to me. I know it is secure, I just don’t like it! My recommendation is to go into a store and play around with the machines, practice taking the bowl and beaters off and on and see what feels most comfortable to you. Ask the salesperson if they are able to show you how to put attachments on the machine! I am serious! All of these things sound weird and trivial, but if you’ve never used one before, it can be kind of daunting!
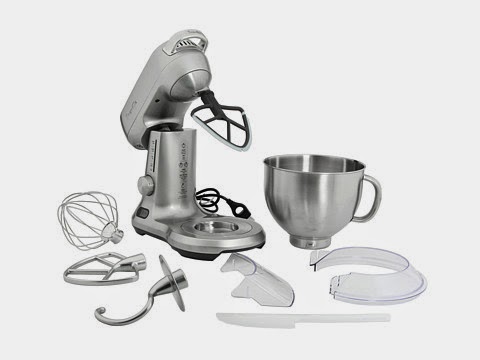
Breville has a stand mixer, however I unfortunately have no experience with their products but know they are extremely reputable. The other thing is that nobody has had one for 40 years yet to say “these babies last 40 years!” like the Kitchen Aid, so until that happens, I am going to keep on keepin’ on! (I’d say once somebody has had one for a decade, we’ll call them solid – haha!)
Breville Scraper Mixer Pro
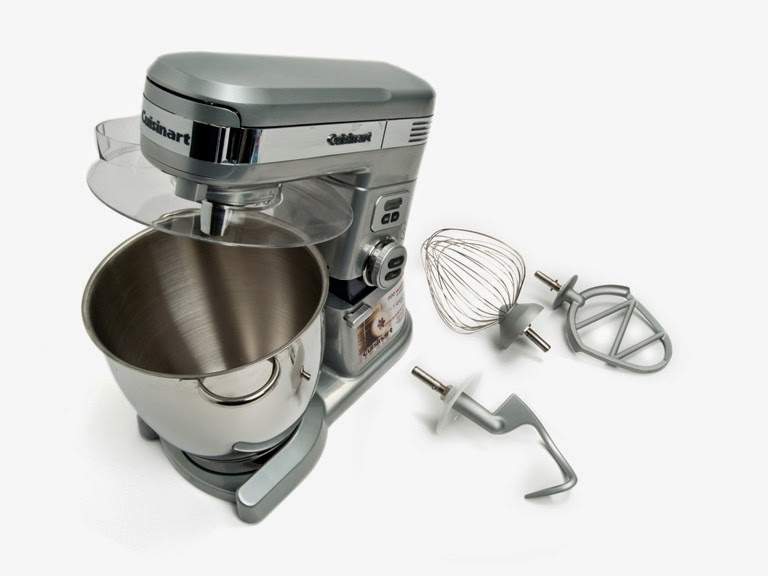
I do NOT recommend the Cuisinart stand mixer! Repeat this mantra – “Kitchen Aid stand mixer, Cuisinart food processor!” (We’ll discuss food processors in another blog, I promise!) They tried to overcome the very minor complaints with the Kitchen Aid, but I don’t think they succeeded. For one thing, when they were first introduced I got to attend a big demo event because they launched a lot of new items that year. The rep for Cuisinart kept saying the model she was demonstrating to us was not the “official” one for sale but a prototype – yeah right! She had a lot of issues getting it to even work at first, and once we started using one in the store I worked at we realized more of its shortcomings. It’s available in 5 and 7 quart models in various colors.
Cuisinart stand mixer
The pouring shield attaches to the tilt head so you don’t need to find somewhere to set it down like with the Kitchen Aid shield. However, anything you may have “spilled” in the pour spout of the pouring shield when dumping it in the mixer will drip down onto the machine when you lift the tilt head up to retrieve the bowl. Our example was vanilla…dripping all down the side of that beautiful white machine! Extra cleanup is never good in my book!
The one really cool feature of the Cuisinart is the digital countdown timer with auto-off, which Breville has incorporated into their Scraper Mixer Pro. I unfortunately think adding something digital to the mixer is going to reduce its lifespan, but would assume that the mixer itself would continue to work despite a digital timer feature “wearing out”. I think that’s another reason the Cuisinart doesn’t seem to have the power it should – they added an extra “outlet” for a variety of attachments, most appealing to consumers being the blender and food processor attachments. The food processor attachment is surprisingly different than a food chopper of the same size (3 cups) in freestanding form. Those choppers only do one thing – chop. This attachment actually has slicing and shredding discs like a real food processor. There is also a meat grinder attachment that is very similar to the Kitchen Aid one.
Electric Stand Mixers with Detachable Hand Mixer
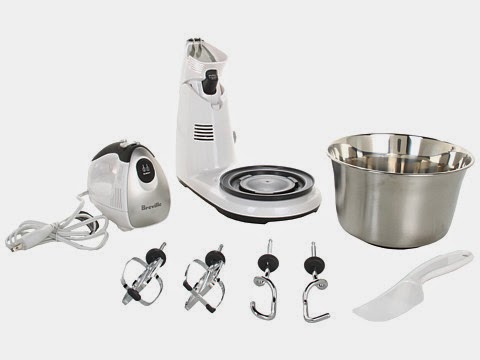
Some people like the idea of the stand mixer with the hand mixer piece that detaches. I’m not sure that these will have the “reach” that standard stand mixers claim to have with their planetary mixing action. These have two separate motors, one that powers the hand mixer portion with the beaters and the other that spins the bowl, which should force the mixture to combine at least almost as well. Be careful – some inexpensive stand mixer models look like they have a detachable hand mixer but they don’t, it’s just a design illusion. I’d definitely recommend the stronger motor, at least 325 watts, because like I mentioned in the hand mixer section, the motors on those little guys aren’t going to be strong enough to actually handle dough on the dough hooks that come with them. Breville’s has 380 watts and seems like a good choice for this category.
Breville Handy Stand Mixer
Stand Mixer “Standard” Accessories
These are standard for the Kitchen Aid mixer but most mixers should have the three standard mixing pieces. Here’s a quick video to demonstrate how the accessories attach to the mixer:
**Note that some accessories for Kitchen Aid are “coated” and some are not. The coating can chip off if you are very hard on them. NEITHER can go in the dishwasher – all of the mixing pieces are hand wash only!**
***These links might not go to your exact model number! Please search for the correct piece if you are looking to replace something on an existing machine!***
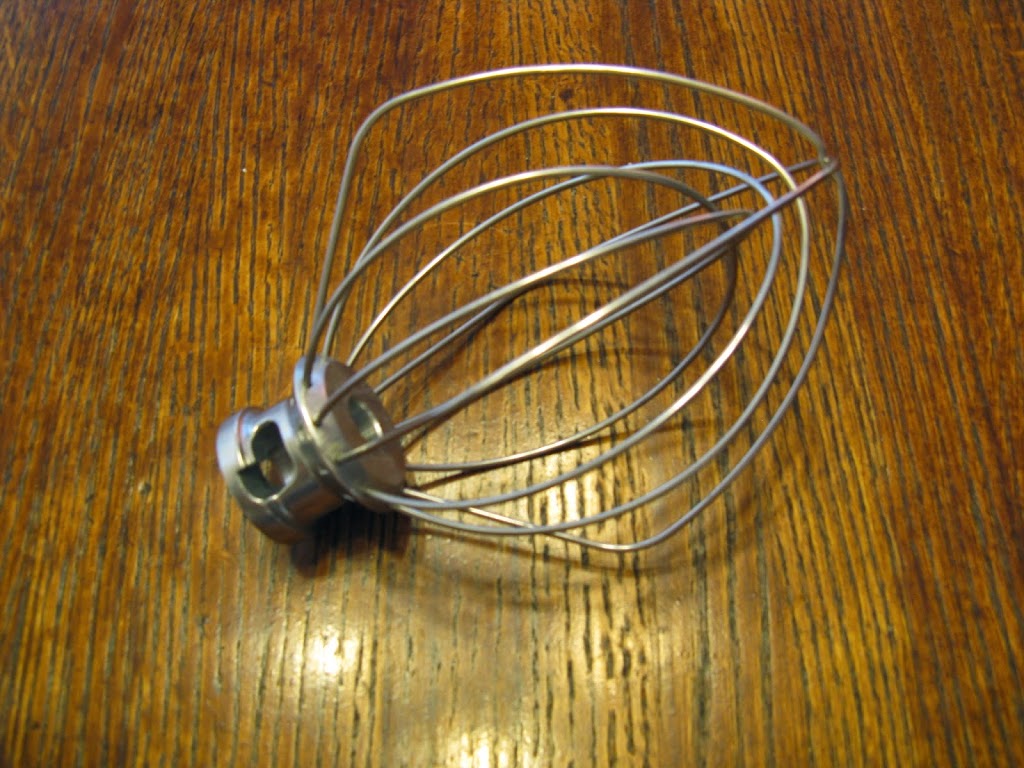
Wire Whip – This is the piece that looks like a whisk. You’re going to use this to make icing, meringue, whipped cream, or anything that calls for a whisk that isn’t too tough to mix through.
Wire whip
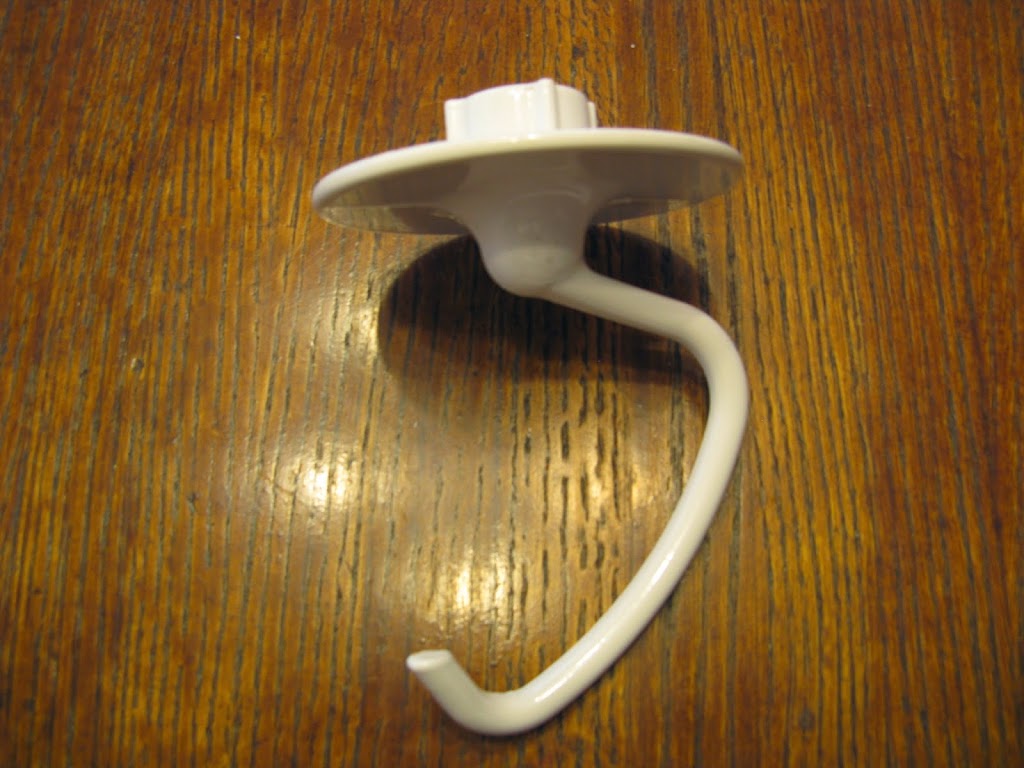
Dough Hook – This is the piece that looks like a pirate hook on the smaller machines, and on the larger ones it’s a tad curlier-looking. You’ll use this for bread or pizza dough, and you’ll know you made your dough correctly when you see it “tornado” up the hook.
Coated dough hook
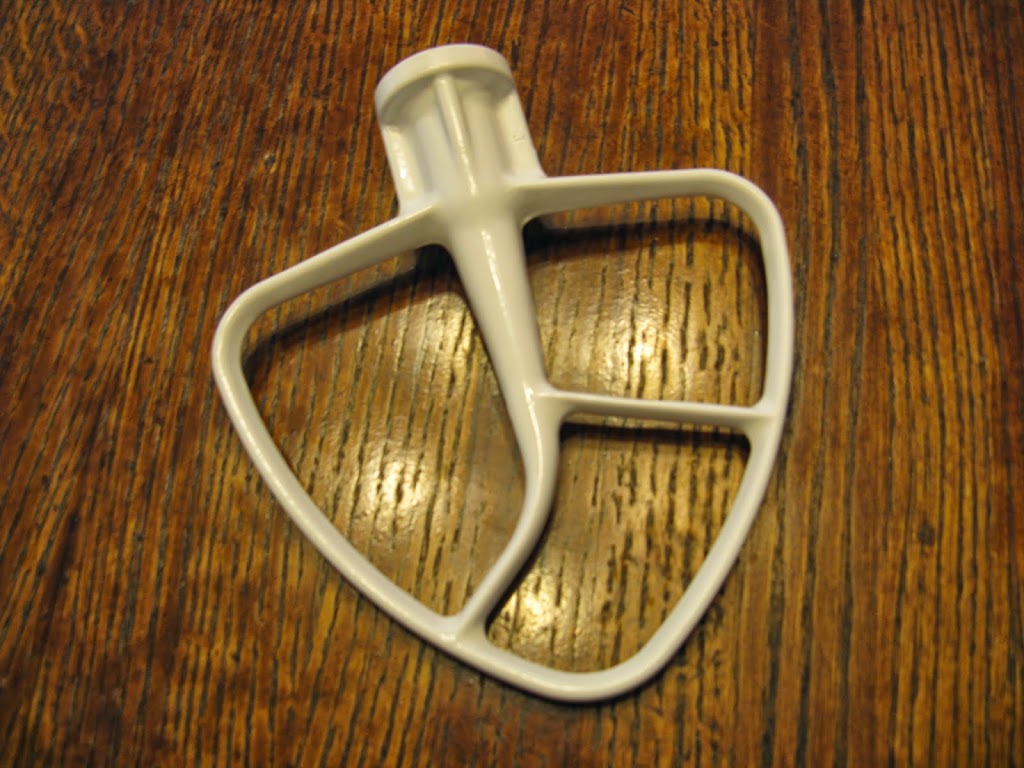
Flat Beater – This is the piece I use the most, it’s the flat triangular-looking piece. This is for cookies, cakes, etc. or anytime the recipe tells you to “beat” something.
Coated flat beater
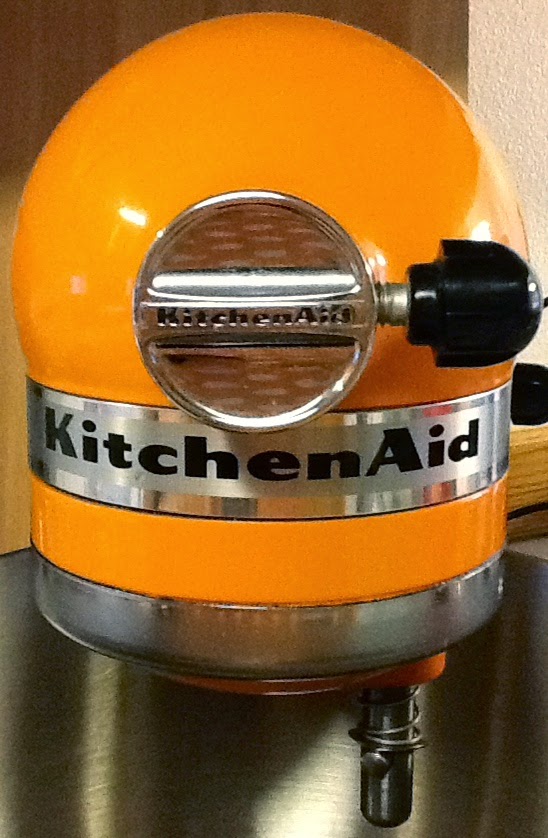
Power Hub – For attachments, which are sold separately. [We can discuss these further in a future blog!] When you put an attachment on the power hub, you turn the machine on the same way as if you were mixing, and yes, the lower piece where you attach the whip/beater/hook will spin around while you are using the attachment piece. Don’t worry!
Kitchen Aid power hub
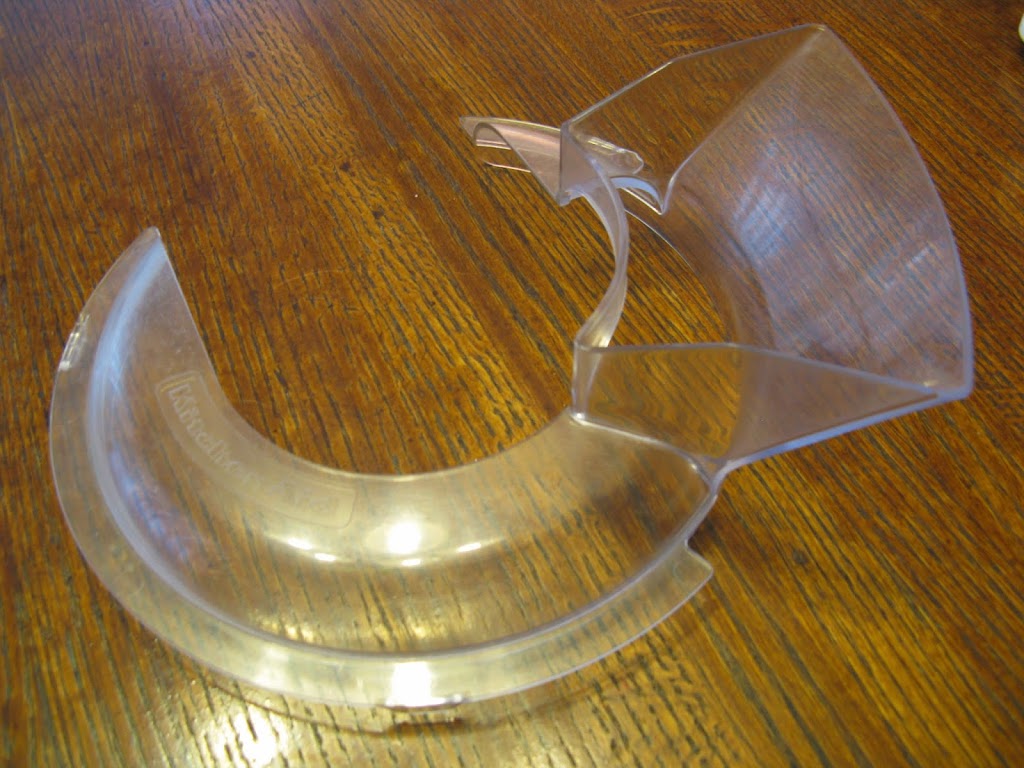
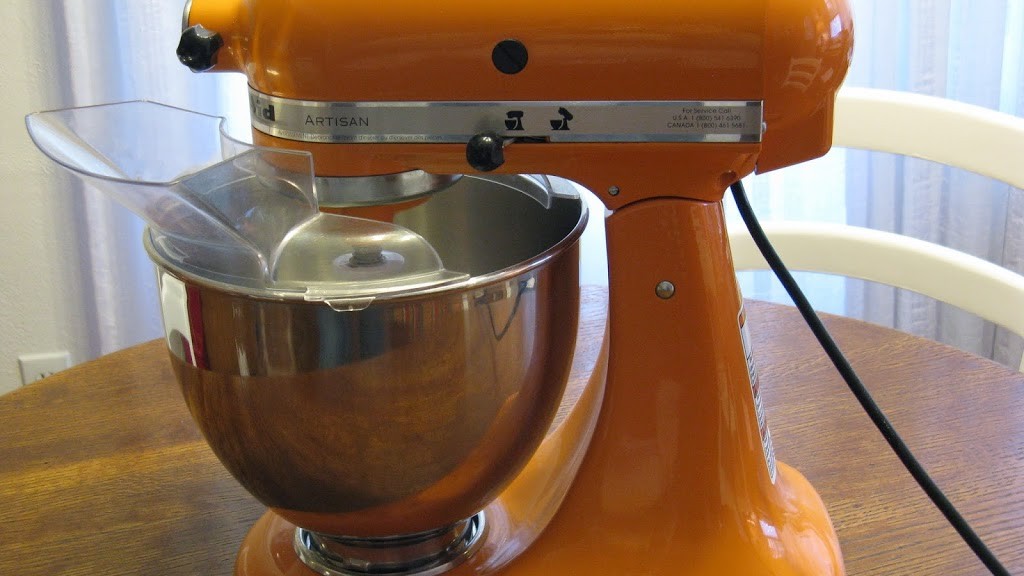
Pouring Shield – Older models may have come with a 2-piece pouring shield, but the newer ones are 1-piece on Kitchen Aid. Breville’s looks like it is 2 pieces. This is to prevent splatter coming out of the bowl but has a pour spout so you can add ingredients while the mixer is still running.
Kitchen Aid 1-piece pouring shield
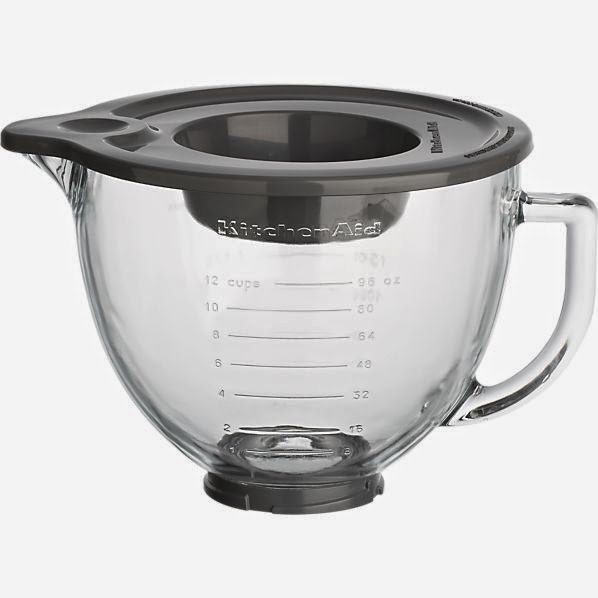
Glass Bowl – Some of the new mixers have the option of a glass bowl, or you can purchase it separately for certain models to replace your stainless bowl with. It comes with a lid, which is helpful for refrigerator storage. It is extremely heavy, however, so think about when it’s full and having to maneuver it around! So far I know they make a 5 quart tilt head and a 6 quart bowl lift glass bowl. They are so popular I am sure they are working on them for the other models, be patient!
Kitchen Aid glass bowl w/ lid
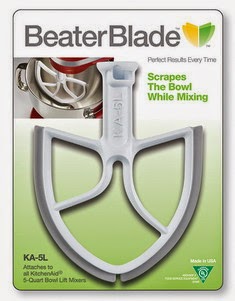
Flex Edge Beater Blade – Kitchen Aid now makes a scraper blade attachment, but they were extremely reluctant to do so.
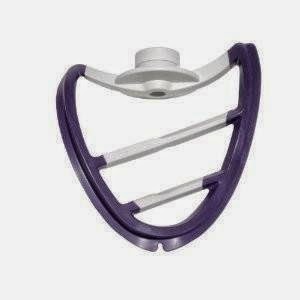
Beater Blade and Pourfect Scrape-A-Bowl – These two competitors came out with their silicone-edged flat beaters first, and technically using them violates your Kitchen Aid warranty, but people were buying them in handfuls anyway, so Kitchen Aid had to get on board and get some of that market!
Beater Blade
Scrape-a-Bowl
**I personally just use a regular silicone spatula – it will heel to the mixer if you use it while turned on and won’t break or chip.**

Electric Grills

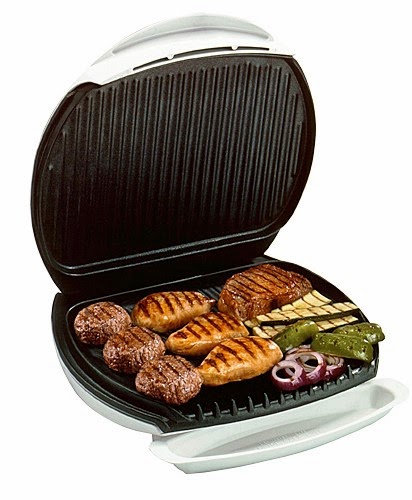
George Foreman “original”
Electric grills are one of those appliances that all the manufacturers seem frequently produce new models so it’s hard to keep up, so just keep in mind what options you are after and stick with a trusted brand name. If you treat it well, it should last you more than a few years, but always remember that they do not build appliances to last anymore!!
A lot of manufacturers now offer a multitude of options on the countertop grills, so think about how much versatility you’re looking for. Any of these styles will have a nonstick coating on the grill plates (silicone, plastic, or wood utensils only!) and should come with some sort of a removable grease drip cup or pan, FYI! Keep in mind that that most household electrics don’t have the power to get really high temperatures that some people prefer for grilling meats, so if you’re one of those folks, one of these probably isn’t going to satisfy your wants.
Standard/Basic/“Classic” Grills
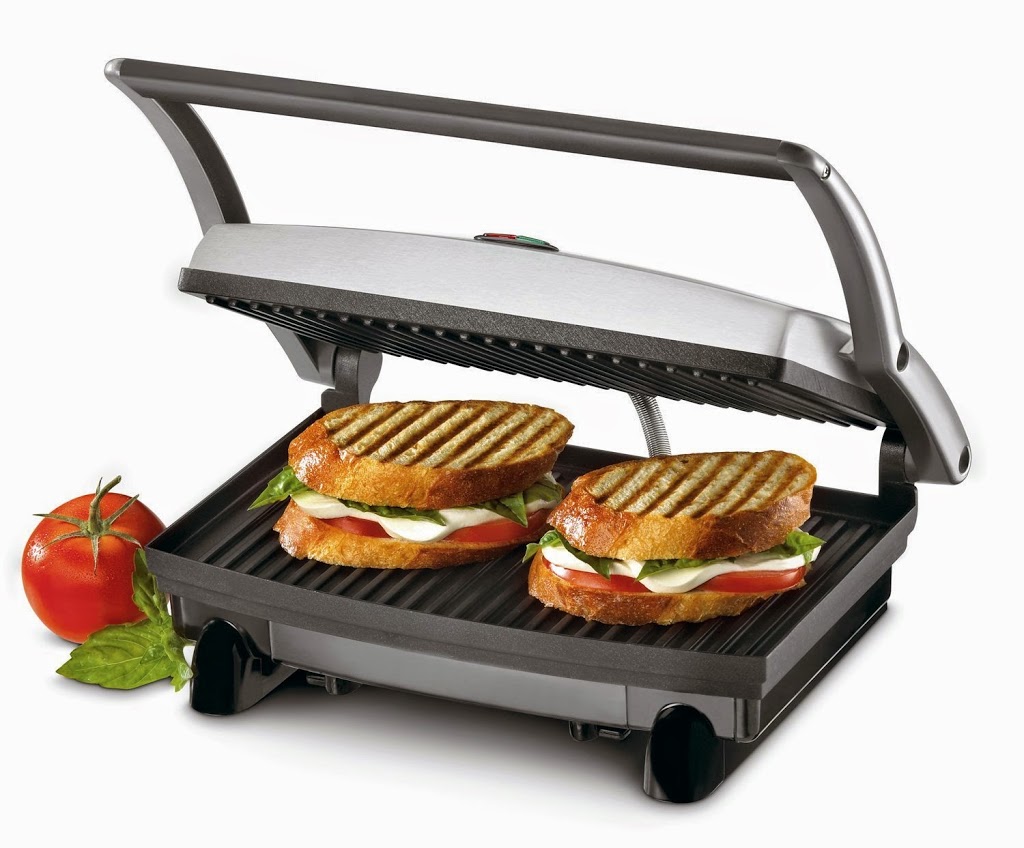
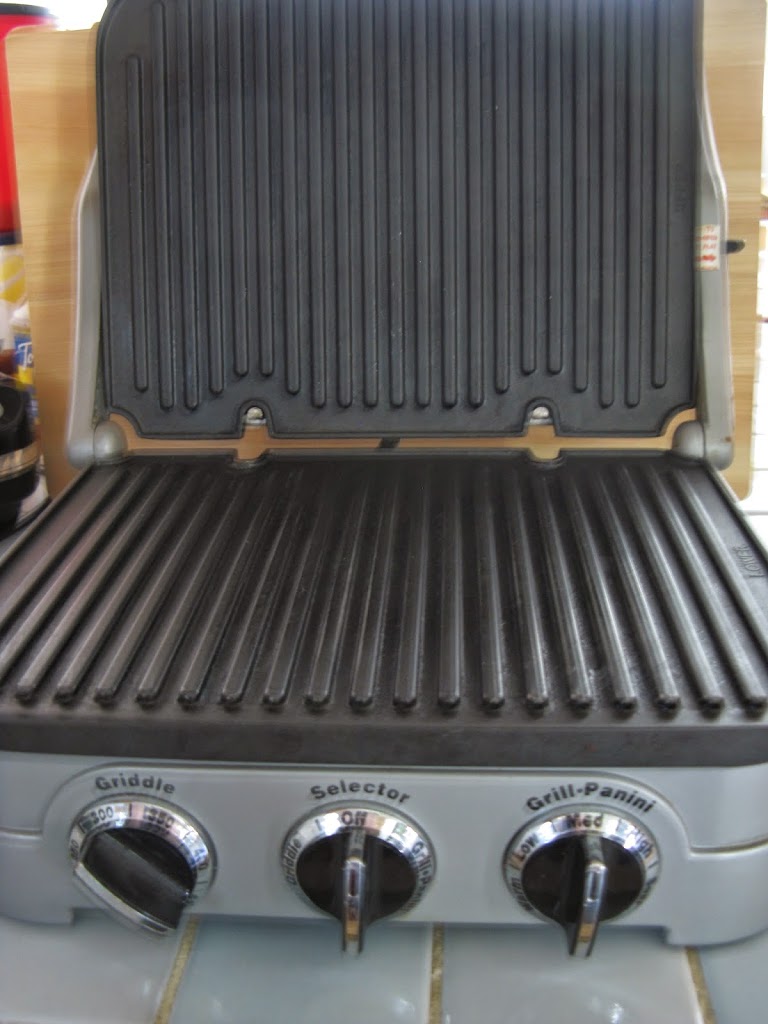
Cuisinart Grill & Panini Press
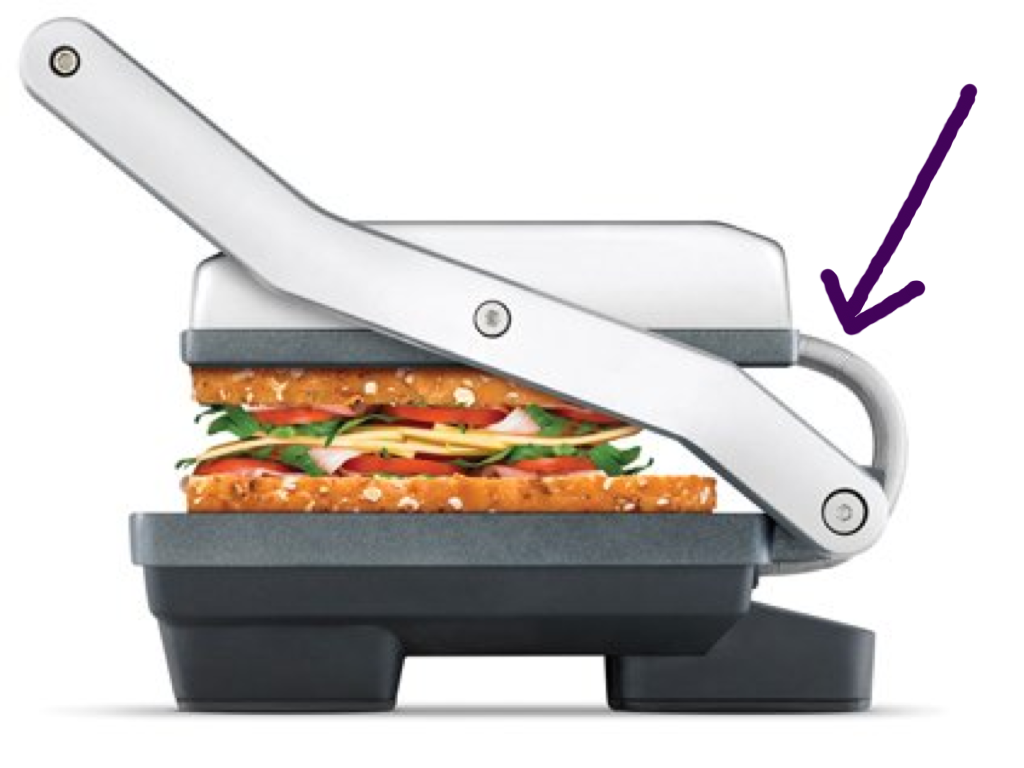
A standard countertop grill is something like the “classic” George Foreman grills. (I like the way they designate the categories on their site, so I am going to utilize those! Brilliant!) The grill plates do not come off, and on most of them the back hinge isn’t adjustable, so it seems to hinder what you can cook on some of the grills if they are not large enough. I actually knew a few people that had two or three different sizes of these so they could cook exactly what they needed on the right size grill. (The Breville Panini Grill has a floating hinge so you won’t have this issue – read more about floating hinges below!) Some offer the feature of opening up flat to increase your grilling surface, like the Cuisinart Grill & Panini Press.
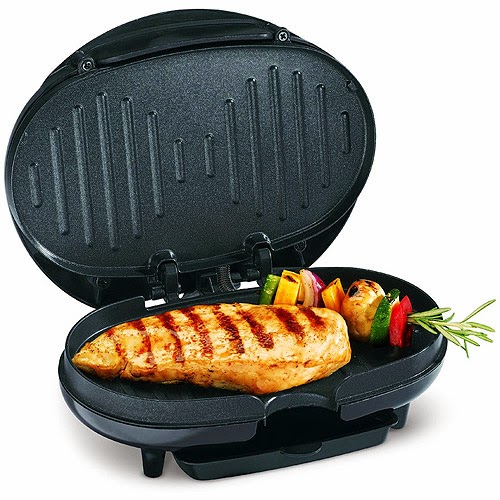
Proctor Silex grill
A lot of brands that make smaller ones call them sandwich or panini grills but you can fit small cuts of meat on these. BE CAREFUL! There are also actual “sandwich makers” that make pocket sandwiches, a whole different ballpark! This size makes a great gift for a single person. I had a Proctor-Silex sandwich-sized grill for years (looks like it’s just an earlier version of what they are still selling today – mine was white!) that never let me down and I ended up gifting it to a friend when I finally upgraded to a multi-plate grill/griddle.
These can be a pain to clean up – be prepared to waste a LOT of paper towels!
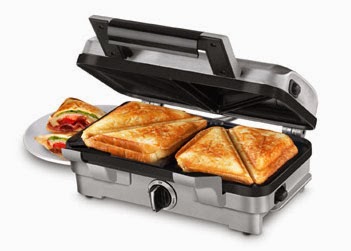
Cuisinart Sandwich Maker – not a grill/panini/griddle!
Removable-Plate Grills
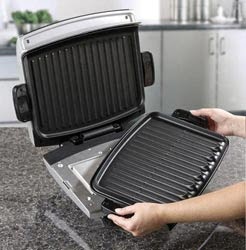
George Foreman removable plate
Removable-plate grills are basically the same as the standard/classic grill except that the grill plates are removable for easier cleanup. Usually they can go in the dishwasher, but I really wouldn’t recommend it. I put mine in the dishwasher once or twice and I’m pretty sure that helped the nonstick coating come completely off in a few spots where it was beginning to wear down, and it also looked very dull. The good thing is that reputable manufacturers will be able to sell you replacement grill plates, so your machine could end up lasting a lot longer since that’s usually why people end up getting rid of their classic models, not because they’re broken.
Multi-Plate Grills
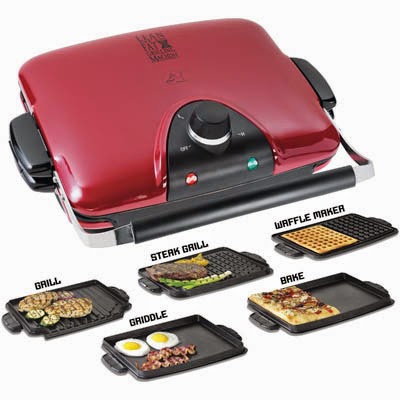
Multi-plate grills are really cool, because they offer more versatility in helping you keep your kitchen clear of a few more appliances! Usually they are grill/griddle options, but a few manufacturers have now come out with waffle plate options, which is really cool.
George Foreman 6-Plate Grill
I own the original version of the Cuisinart Griddler (mine has a drip cups instead of a built-in drip tray like the one in the link) and I’ve had it for many years now. I mainly use the grill plates, but the griddle plates have definitely been handy when moving and the stove is covered in boxes!! I have decided to start making more pancakes and am going to start using the griddle plates on my Griddler instead of frying pans to see if I fare any better at making decent-looking pancakes! (They taste fine, but boy are they ugly!)

My Cuisinart Griddler cooking up some grilled cheese!

For this newer version of the Griddler, you can purchase waffle plates separately, which I find interesting since their “Deluxe” and “Elite” models don’t have waffle plates and cost more. Those models have an added “top melt” heating feature and can sear at 500 degrees for two minutes at a time, which is a huge benefit because most countertop appliances cannot attain that high temperature. One of these models would definitely be what the high-heat griller in your life is looking for!

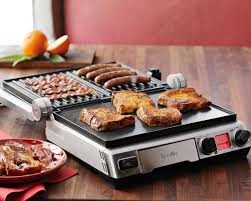
Breville Smart Grill
Black & Decker makes a 3-in-1 machine that has reversible grill/waffle plates and separate griddle plates, although their website doesn’t show images of the grill plate sides at all.
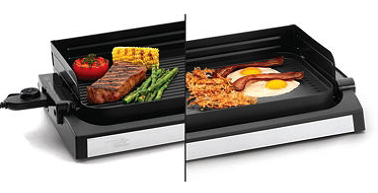
There are larger electric reversible grill/griddle appliances that are an “open” grill, meaning there’s no lid to put pressure on what you’re grilling, so you’d have to actually flip your food over to cook it like a real grill. These can be good for large families or people who do a lot of entertaining because they are generally much larger. A few examples are Cuisinart, Wolfgang Puck, & Hamilton Beach.
Wolfgang Puck Reversible Electric Grill/Griddle
Floating Hinge
One thing I love about my Griddler is the “floating hinge” feature, and I strongly recommend finding a model with an option similar to that because I think it helps cook larger items more evenly by putting an even amount of pressure on the items. With my old Proctor-Silex I always felt the front of burgers weren’t getting cooked and was constantly turning them. Now I can make thick panini sandwiches and use a potholder to push on the top of the grill to make sure it is perfectly flat and cooking the sandwich evenly. It looks like Breville uses a floating hinge on both their Smart Grill and their Panini Grill.
Breville Panini Grill floating hinge
Indoor/Outdoor Electric Grills
You can now find a variety of freestanding electric grills to cater to the growing market of consumers who aren’t allowed to have propane or charcoal grills in their apartment complexes but still want to grill! The great thing about these is that they can be used inside or outside, the bad news is you might not have that much room in the house. Also, if you are using a larger grill at full capacity, it might produce too much smoke to use indoors.
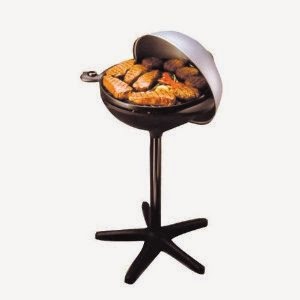
George Foreman indoor/outdoor electric grill
There’s now actually a really cool George Foreman indoor/outdoor grill that comes apart so you can use it as a countertop model indoors – the others all need to remain on their stands if brought inside.
Outdoor Electric Grills
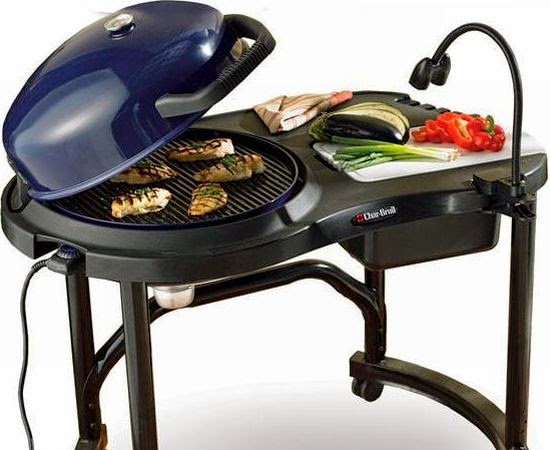
Generally you are not going to be using anything over 1500 watts inside of your home, so anything above that is going to be able to reach higher temperatures and need to be utilized outside. The majority of outdoor electric grills are tabletop design as the intended audience are folks living in small spaces like apartment complexes that don’t allow propane or charcoal grills. Some of the popular propane and charcoal grill companies make electric outdoor grills now, which I’m sure are as good of quality as their counterparts.
Cuisinart actually makes several propane and charcoal grills, but they specifically make a tabletop outdoor electric grill or you can get it with a three-position telescoping base for the option to make it taller like a real grill.
Char-Broil outdoor electric grill
HELPFUL LINKS:
My Griddler with original grill plates
– still going strong!


Juicers

Juicing in and of itself can be daunting to those who are new to it, let alone the part where you have to pick out a new appliance to accomplish all the cool new things you want to try to do. My first recommendation would be to find some books on the topic that interest you to see if there’s a particular trend in the type of appliance the authors are recommending. I would also make a list of things you intend to juice that you think might be awkward in just a regular blender, that way you can ask your salesperson qualifying questions about all the machines you might encounter to find the best fit for your individual needs.
Do NOT get suckered into whatever your friends tell you is the new best hot thing, unless your friend has been using said item for a number of years heavily and you trust their opinion. 😉 Fads come and go – these machines cost a lot of money! They will last forever if you get the right one that works for you.
As with anything, look at the type of warranty they offer and look at both positive and negative reviews to see if their customer service is reputable in case you have an issue. These machines are expensive and should last you many years if treated properly!!
Question 1 – Do you want to juice wheatgrass or other leafy greens?
Ok, you’ve decided it’s time to take a step up from your regular blender. You hear about how amazing the VitaMix is, but then there’s all these juicers, too, what’s the difference?
A VitaMix is still a blender, while an extremely powerful blender, everything you put into it pours out into your glass to drink, so if you want to add wheatgrass, you’re going to have some issues. I did find some tricks to extract the juice from the wheatgrass without a juicer, but it seems like a lot of extra work to me, personally.
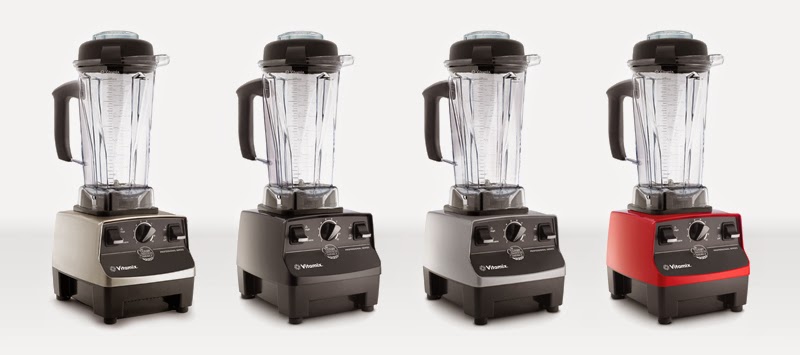
VitaMix Professional Series blenders
If you don’t care about greens, then a VitaMix might be all you need. You can do all sorts of awesome things in the VitaMix like make your own nut butters, confectionary sugars, etc. so it’s a great addition to your home if you want to make more of your own pantry staples as well as juices and smoothies.
One last thing to remember is that blending your fruits and vegetables adds more oxygen (and with the VitaMix, possibly heat) which in turn reduces the amount of nutrients you are actually extracting from them.
(Don’t worry, I will cover the VitaMix and blenders in more detail in another blog post! This is just to help you figure out super-blender vs. juicer.)
Question 2 – What’s the difference between the types of juicers? (Or, as one friend said, “There’s more than one type of juicer?!?”)
Alright, so you do need to step into juicer land. But there are so many!! At least with the blenders, you know VitaMix is the next step up and that’s it! (Ok, that’s not really it, there’s a bazillion different VitaMix models and now the Ninja with their bazillion different models, too…another time!) But juicers…where to begin?!
The main difference between any juicer on the market is whether it is centrifugal, masticating, or triturating. What???
Centrifugal —> Masticating —> Triturating in this order is equal to:
Cost – lowest to highest
Nutrients extracted – lowest to highest
Speed – fastest to slowest
Foam produced – most to least
Noise – most to least
Assembly – easy to complex
Weight – light to heavy
Versatility – least to most
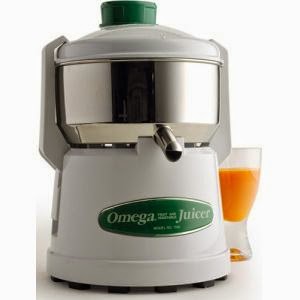
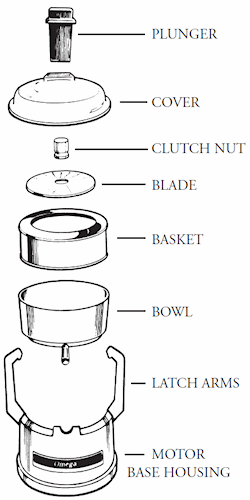
Omega centrifugal juicer
Centrifugal Juicers
Omega centrifugal juicer parts
Did you ever get to use a centrifuge in science class or see them use it on the TV shows when they are looking at blood samples? It’s a spinny-thing. 😉 It spins around really fast and separates substances of different densities, so with blood, you can tell what percentage of red blood cells are in it. It uses “centrifugal force”, thus its name. So, from this we can deduce a centrifugal juicer must spin around, yes? 🙂 On a juicer, it is basically a metal drum that has teeth inside of it to help rip the pulp to extract the juice.
These are the least expensive of the various juicer models and don’t have a lot of parts. Because they spin so fast, a lot of foam is produced. You also don’t retain a lot of the nutrients from what you’re juicing, so it’s recommended to drink the juice immediately after juicing to reap the benefits. The amount of juice extracted from the fruit and vegetables will also be lower than with the other styles, and they also aren’t as effective with wheatgrass or other leafy vegetables.
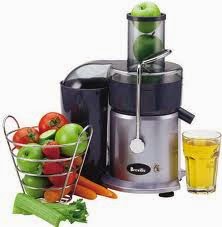
Breville Juice Fountain
I personally think they are kind of messy to clean up because you have to get all the pulp out of the interior. I know the Omega brand centrifugal juicer has the option of purchasing filters to make cleanup easier, but even using those I still found it to be quite messy. The Breville Juice Fountain comes with a pulp container, but I would assume the interior still needs to be cleaned like the Omega. However, I don’t have experience with this! It just makes sense as to how they work; the Breville obviously just pushes most of the pulp into another receptacle after tearing it apart in the centrifugal portion. The Juice Fountain does claim to extract more nutrients because its design reduces contact in the centrifugal piece, which is where the oxygen is coming into play.
Jack LaLanne’s Power Juicer is a centrifugal style juicer. It has a really large feed chute, which is really all that I can tell that sets it apart from other centrifugal juicers. There are different models, some of which have similar features to the Breville Juice Fountain. Remember that you do still need to take large, hard pits out of fruits, so you might still have to do a little prep work despite its large feed tube. I had a roommate who really loved these, but mentioned that she often had to replace parts on it, yet she still swore by them. She found the machines and/or their parts at Goodwill frequently and purchased them anytime she found them so that she’d have the spare parts! That doesn’t scream endurance to me, but obviously she liked it.
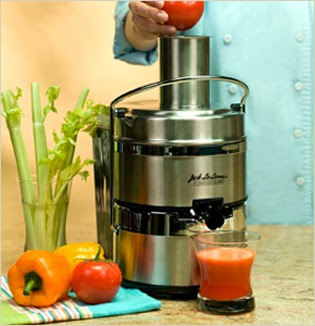
Jack LaLanne Power Juicer Pro
De’Longhi, Cuisinart, and Krups now also make centrifugal juicers, too!
Masticating Juicers
Masticating style juicers are what most serious juicers are probably going to own, or wish they owned, at least. These folks are more into their wheatgrass and greens and extracting more nutrients out of what they are juicing, as well. Why does that word sound familiar? Masticate. Ah – Chewing! Crushing food by grinding. And they do utilize an auger, just like a food grinder. Crazy! They actually make these in horizontal and upright styles, and each can do different things.
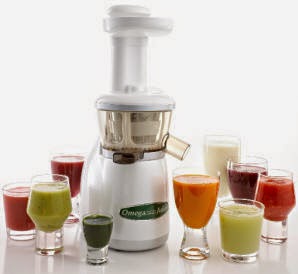
Omega Vert juicer
I am going to assume the mindset of folks owning these is similar to my own, which is that all serious electric juicers are expensive, so you might as well get the one that pulls more nutrients out of the produce you’re spending all that money on, while not completely breaking the bank on the even more expensive triturating style juicer. While these do have more parts than a centrifugal juicer, I personally find clean up to be much more simple because very little fruit remains on the individual parts and they are also small and easy to rinse under the faucet.
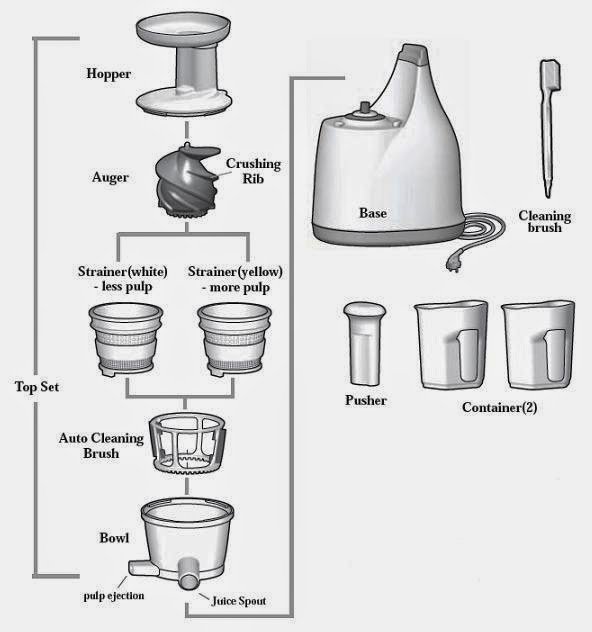
Omega Vert juicer parts
Omega’s Vert Juicer has a pulp ejection container as well as the juice container, so that makes it easier if you want to use the pulp – and there ARE ways to utilize your pulp afterwards! (Google, people!) I think this juicer is just extremely fun to use and really simple, so it’s my personal favorite. You literally just shove fruit and veggies into the top and it does its thing and plops the juice into one container and the pulp in another. Voila!
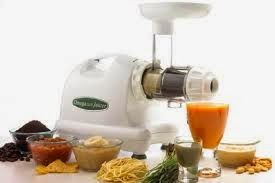
Omega Nutrition Center
The Omega Nutrition Center Juicer is their original masticating juicer, and it’s pretty simple to use, too, but since it can do so many more things besides juice, there are a lot more interchangeable parts. This machine is horizontal (Vert is…you guessed it, vertical!) and can also extrude pasta and soy milk, grind and mince coffee and herbs, make baby food, nut butters and frozen desserts. So this is obviously an amazing choice if you need the machine to do a little bit more of what you might want to do in a blender and makes this more of a comparison to a VitaMix than the other juicers. This machine doesn’t necessarily come with containers to catch the juice and the pulp (there is one small container with a sieve piece to help filter your juice more afterwards if it’s still pulpy); the juice comes out of the bottom of the “drum” and the pulp or anything else you make with the machine comes out of the front end of the “drum cap”.
Nutrition Center parts (similar pieces are interchangeable)
Omega seem to be consistently rated the top juicers in the ‘masticating’ category on most juicing sites I have discovered, and I honestly never had any customer complaints or returns with their machines, so I would definitely highly recommend Omega. However, there are other brands!
The Breville Juice Fountain Crush just came out in 2013 so there aren’t a lot of reviews available yet, but their centrifugal Juice Fountain is so highly regarded, I am sure this is going to be a really good model to try. Other brands that seem relatively popular include Hurom, Kuvings, Champion, & Big Boss. Krups has also just come out with a masticating juicer, too.
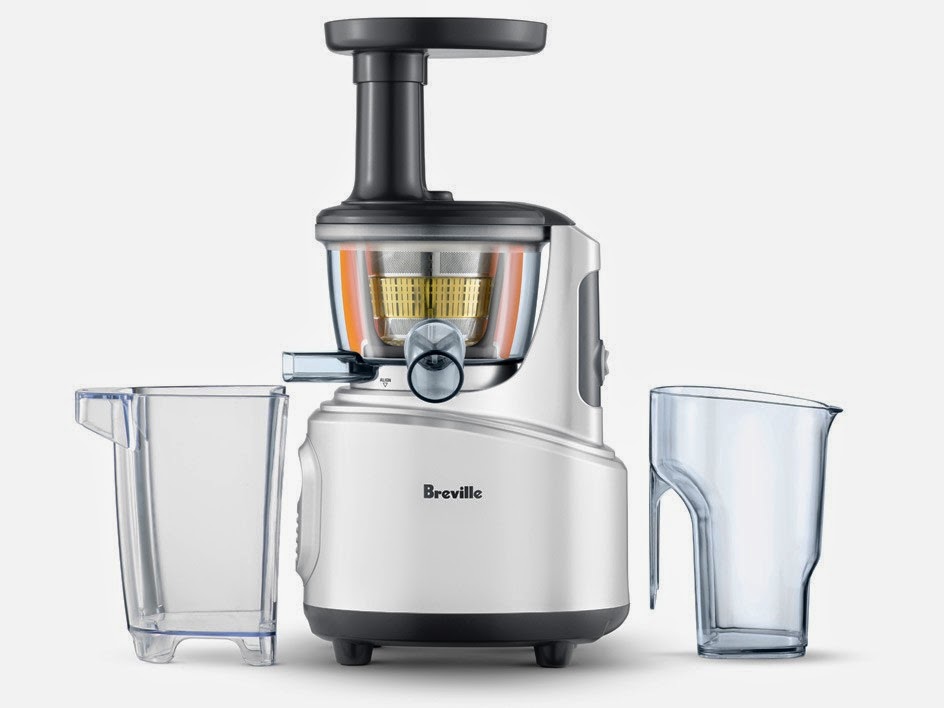
Breville Juice Fountain Crush
Triturating Juicers
Trituration is the act of grinding, like with powders in a mortar and pestle. Triturating juicers are the most expensive on the market and I have no experience with them at all, unfortunately. This type of juicer will extract the most juice of all the options because it uses very powerful twin gears that crush almost anything you put into them dry.
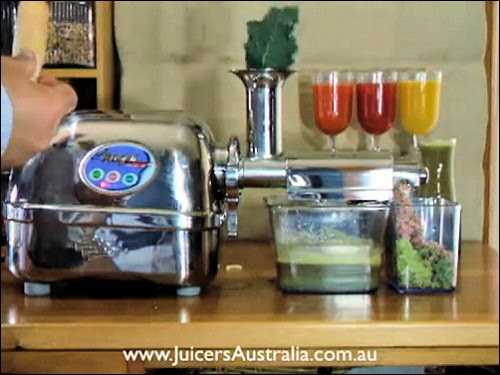
Angel juicer
Since triturating machines grind and crush, you can also use them as a food mill. They work rather slowly in order to keep the oxygen out and retain the nutrients, but because of this are virtually silent when operating. Very little foam is produced using this method and of course wheatgrass and greens are great in them. They can even crush harder fruits like guava, and also crushes seeds to extract their juices, too! (Be cautious – some pits can have poisonous effects and are not recommended to be eaten so know your pits and seeds!) Triturating juicers are of course very large and heavy, so storage space and having to move it around frequently might be a concern.
I would say these machines are for people who definitely have the money and the space, and to spend this kind of money on a juicer you are probably extremely serious and juice several times a day, or really just have a lot of money to spend on stuff you don’t need! 😛
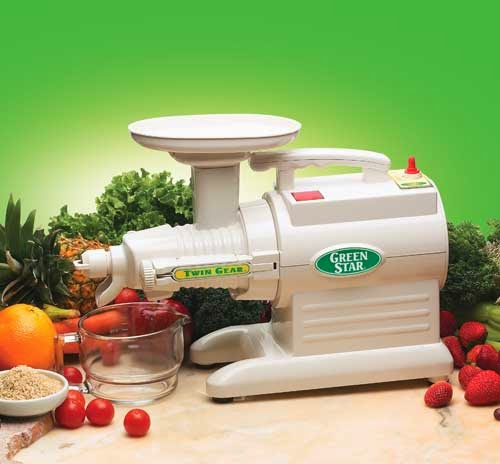
Green Star juicer
The only two brands I can really seem to find, but both seem very highly recommended on juicing sites are Green Star & Green Power Juicers and Angel Juicers. Green Star & Green Power were the mostly widely recognized name and several models seemed to be recommended across several sites.
Wheatgrass Juicers
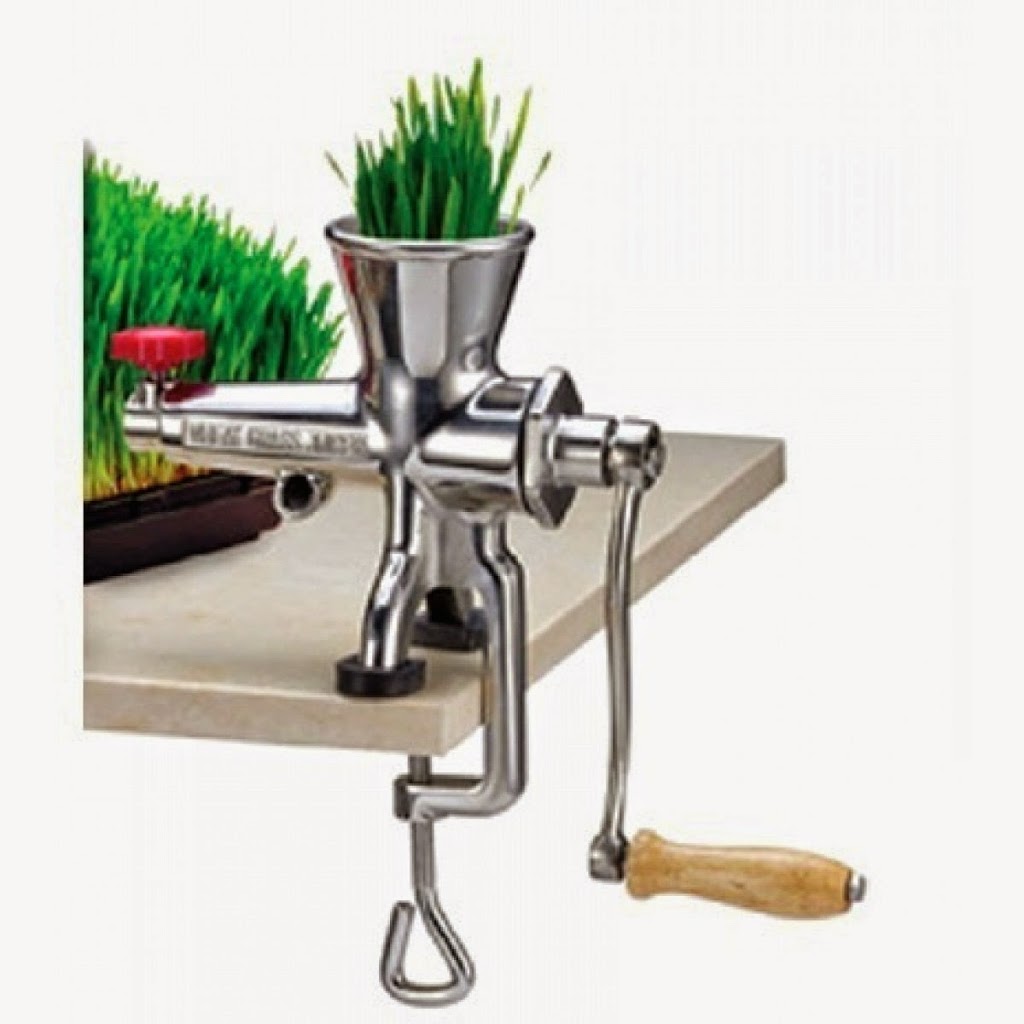
 
Weston manual wheatgrass juicer
You can get both manual and electric wheatgrass-only juicers. I’ve never actually utilized one of these. The Miracle brand seems to have a few electric wheatgrass juicer models that can also handle other leafy greens, soft fruits and berries, but normally these machines are only for wheatgrass.
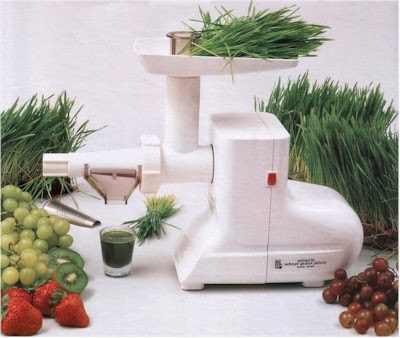
Miracle electric wheatgrass juicer
Electric Citrus Juicers
Just to add clarification, there are a lot of juicers made by all the brand names you are used to seeing on your other kitchen appliances. Most of these look very similar to a countertop glass or ceramic citrus juicer on the top, and that’s because that’s the only thing they can juice are citrus fruits. These are great for people who just like to make their own fresh orange juice or have a home bar and like to squeeze fresh citrus juice quickly and easily. Or, a summertime lemonade stand! 🙂
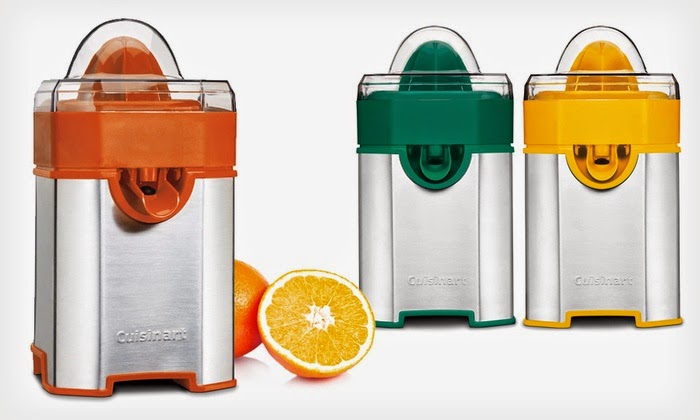
Cuisinart electric citrus juicers
I have always had good luck with the Cuisinart juicer, and a lot of customers were excited when Bodum released theirs because it has two speeds, although it doesn’t look like Bodum is marketing the juicer anymore so perhaps production has stopped. There are still a lot of places to purchase it online and the price doesn’t look any lower, haha!
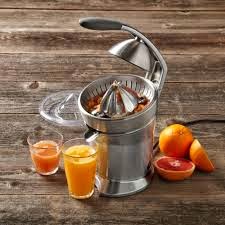
Breville citrus juicer
Breville also makes one, as does Black and Decker, Waring Pro, Krups, Proctor Silex, Hamilton Beach, and many more!
Manual Citrus Juicers
We might as well round it out with the classics since we’ve talked about EVERYTHING else! We’re almost done, I promise!
You’ve got your basic glass or ceramic citrus juicer that’s kind of like a dish. Pretty much all stores sell the same brands from the same distributors like Harold Import Co.

Ceramic countertop citrus juicer
Brands like Chef’n and Prepara have gadgetized that classic idea with storage and measuring devices for the juice to fall into. I really like the Chef’n Juicester because of the measuring piece – it even has small measurement markings. Cleverly, I must say, you can just tilt the Juicester to the small measurement side to see how many teaspoons you’ve got! (The Juicester XL does NOT have the measurements, presumably because you want a lot of juice, not a little!)
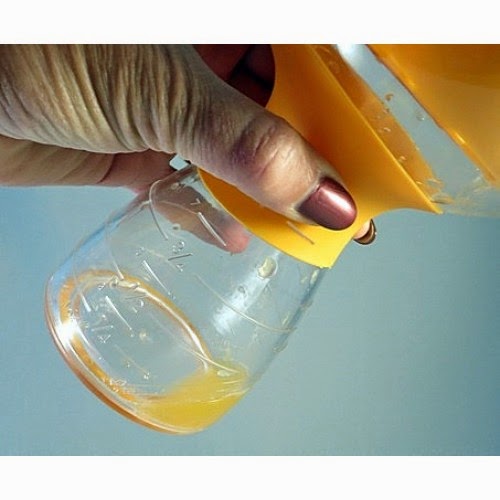
Chef’N Juicester measuring teaspoons!
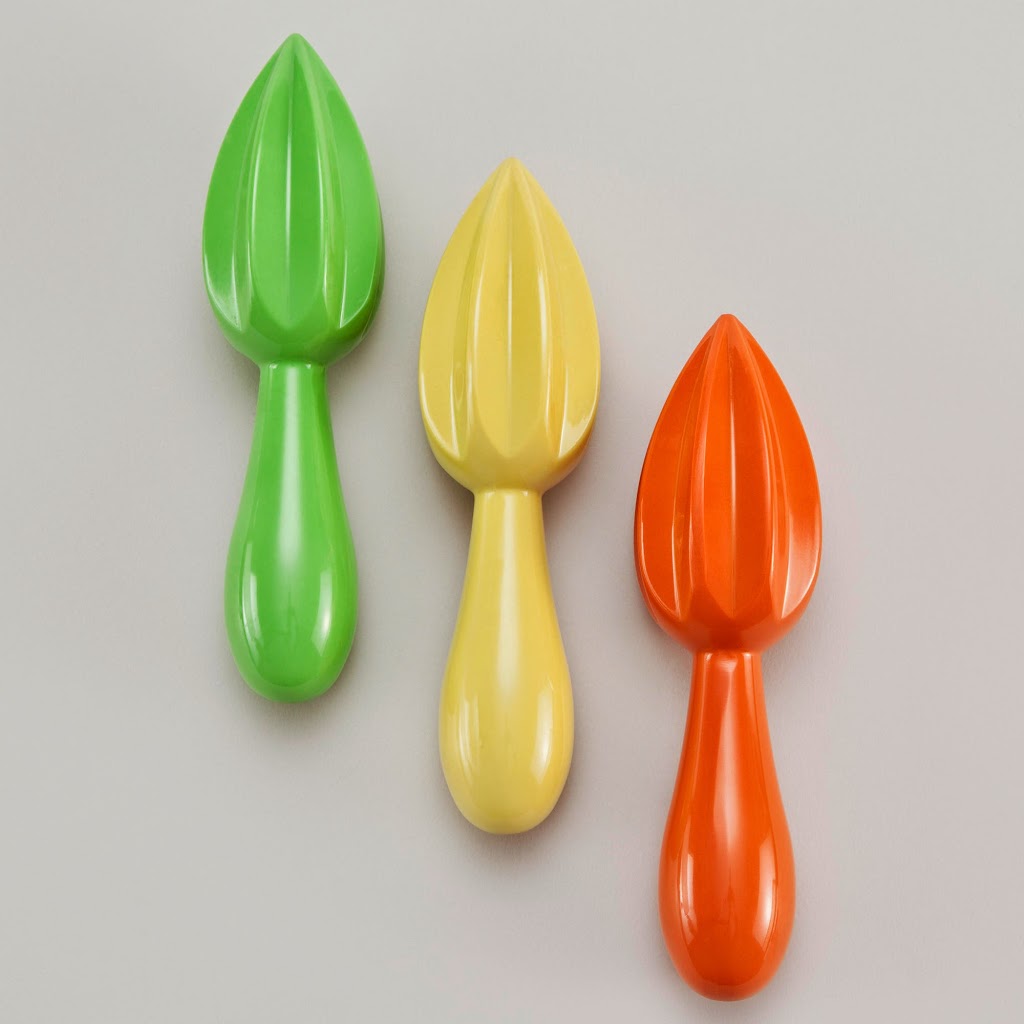
You’ve got citrus reamers – in plastic/melamine, stainless steel, and wood. (You want something non-reactive since citrus is acidic.) Oh, and now there’s even silicone!
Zak! melamine citrus reamers
Hand-held citrus squeezers (I really like the idea of the 2-in-1 Lemon & Lime juicer at the bottom!).
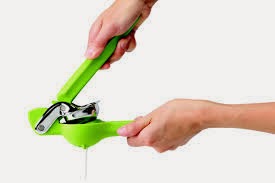
Chef’n hand held lime squeezer
And then there’s the big honking manual bar juicers. Most actual bars will own a commercial juice press, and popular brands include Cilio (search through the “Products —> Bar”), Amco’s OrangeX (I am wondering if I can’t find a direct manufacturer link because the juicers are sold through commercial distributors only??), Metrokane, and the Hamilton Beach Commercial Citrus Juicer.
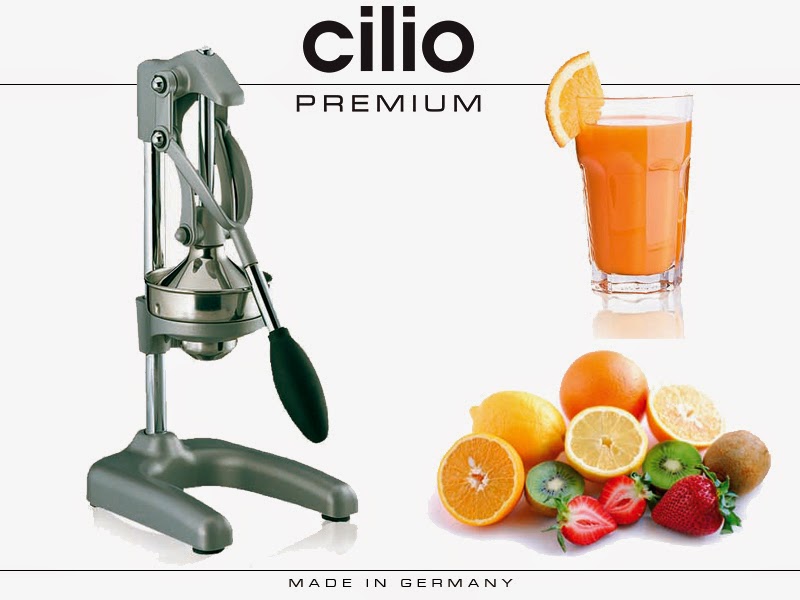
cilio commercial juice press
Alright guys & gals, I am juicer-ed out! I learned a ton researching this blog – I would have been a WAY better salesperson if I had to write an essay like this about them, haha!. I must admit that in doing all this research that I also feel it’s the most comprehensive thing I’ve seen about juicers online, so take that, internet! 🙂
Pressure Cookers (Stovetop & Electric)

Pressure cookers have been making a big comeback over the last decade. Gone are the days of a shaky pot spitting hot steam out at your face. Safety features abound and they’ve even gone from the stovetop to the countertop in many electric models.

How Does a Pressure Cooker Work?

A pressure cooker, stovetop or electric, has a gasket seal on the lid piece that makes it impossible for steam to escape from inside of the cooking vessel once locked into place. As you heat the water/food inside the vessel, the water turns to vapor. Since the steam cannot escape, its molecules will increase velocity, which will increase pressure on the surface of the liquid and the also increase the temperature of the water.*


Why Pressure Cook?

  • Fast – steam cooks food faster than dry cooking methods
  • Nutritional – steamed food retain vitamins and nutrients better than other cooking methods
  • One pot – easy cleanup
  • Braising – works well with foods that require water infusion or braising methods
  • Safe – food is cooked above boiling point, killing most bacteria and micro-organisms
  • Pressure Canning – if you get a large enough pressure cooker, you can also use it for pressure canning. Some people don’t trust themselves to get the time/temperature correct when using a regular pot for canning.
    • Or purchase a pressure canner, which is essentially the same thing, it just won’t have the fancy handles and locks like a stovetop pressure cooker.

Most people really love pressure cookers for cooking beans, artichokes, and making soup stocks.

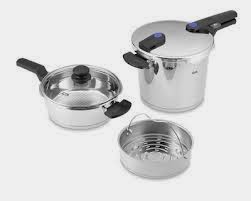
Fissler pressure cooker pans with pressure lid,
glass lid and perforated insert pan

Things to Consider With Both Stovetop and Electric Pressure Cookers:

  • Gaskets wear out (like they would on anything requiring a gasket seal), so I would recommend making sure you can find replacement ones.
  • On that note, making sure any parts are replaceable is key, in my opinion.
  • Reviews on pressure cookers can be tough, because a lot of people are overwhelmed when they finally get it home, don’t use it properly, etc. Reviews on anything, in general, tends to be on the negative side since people with positive experiences don’t feel the urge to get online and complain! So make sure you really do your homework and check reviews from several sources. Cook’s Illustrated and Consumer Reports are high-quality resources.
  • With something that can be considered so dangerous, I personally would spend more to get the top-rated brands. I don’t want to skimp on materials to save a couple of bucks!
  • Find pressure cooker cookbooks that appeal to you. I would refer to something published versus a recipe you find on the internet (unless you know it’s a reputable source!), just like with canning (or pressure canning!) You don’t want to assume everyone knows their internal meat cooking temperatures, etc. At least this isn’t canning and you can always throw your food in a pot on the stove afterwards if it’s not cooked properly!
  • The European Union has very strict standards on pressurized equipment (pressure equipment directive), so if you are still worried, I would look for a European brand to have comfort in knowing it has to be up to par.
  • Everything has to be cooked at once, and some foods don’t taste quite right with the addition of water required to use the cooker.
  • You have to reduce pressure just to inspect the food while cooking, so that is discouraged. It’s recommended to aim to undercook versus overcook, since you can always continue cooking if it’s not done yet.
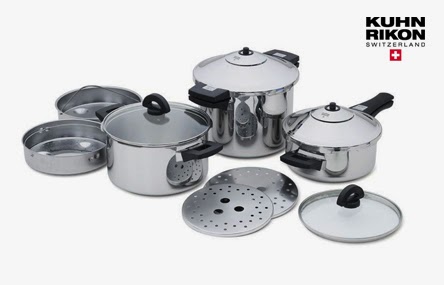
Duromatic pressure cookers and accessories
 

Stovetop Pressure Cookers

Stovetop pressure cookers aren’t what they used to be. Every model I have seen now comes with two ways to release the pressure buildup; a release button on the handle, and the old-school way, by running water over the lid.

All new stovetop pressure cooker lids are shaped in a way or designed in a way that forces the hot steam downwards, away from the cook’s face. They also won’t open until the pressure has been fully released.

You can use your pressure cooker pan as a regular pan without the lid, and my favorite brand, Fissler, actually makes a set that comes with a glass lid, a pressure lid, and two different sized pots that you can interchange the lids between for pressure and regular cooking. I know Kuhn Rikon sells the glass lids with certain cookers and separately. I’m sure other brands must also make glass lids, as well.

Fissler & Kuhn Rikon also make a bunch of really cool accessory pieces if you really want to get into using your pressure cooker as an essential kitchen tool. Who knew you could make a cheesecake in a pressure cooker?

Fissler is made in Germany. They have a unique indicator system that they’ve actually improved upon so you can really see what pressure level you are at; it uses the “traffic light” color model. Their newer models have cool features like an electronic digital readout and a pressure-free steam setting. They are also just very well-marked, making them almost fool-proof to get together and lock into place, unlike some other brands can be.

Kuhn Rikon’s Duromatic, is made in Switzerland. And yes, the pressure cookers are still made there, I know that a lot of their smaller gadgets are not. You can order replacement parts, so that is positive, as well. They’ve pretty much been producing the same cookers for a long time, so they are definitely sturdy and reliable, I just say they’re my second favorite because Fissler has so many cool features. They are both high quality pieces of kitchen equipment, and actually now that pressure cooking is becoming popular again, Kuhn Rikon are starting to revamp their wares again, so check them out!

Fagor is supposed to be a very good inexpensive alternative to these two, so I would recommend checking that brand out above anything else since it had a good rating with Cook’s Illustrated, but I personally have no knowledge about them.

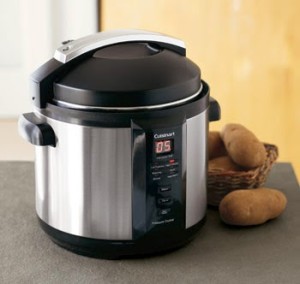
Cuisinart electric pressure cooker

Electric Pressure Cookers

Electric pressure cookers are a great ease if you have room for another countertop appliance in your home. The biggest difference from the stovetop is that you can’t use this as a regular pot on the stove. You can, however, use most of them as slow cookers. Depending on the settings yours comes with, you should also be able to brown or sauté, so you have the potential to use it without pressure.

The safety features on these should really just be that it won’t start unless it’s all locked into place properly. If you are doing slow release, you don’t even have to let the pressure out yourself, it does it for you. (Fast release, you push a lever.)

I am really only familiar with the Cuisinart model; most other models are very new to the market over the last decade and the companies producing them are constantly changing the machines so you generally never see the exact same ones twice. Cuisinart has been making pretty much the same model for longer than that, proving it’s sturdiness and reliability. You can buy replacement parts easily, it comes with a rack and a nice recipe book, along with a 3-year warranty.

* http://www.edinformatics.com/math_science/science_of_cooking/science_of_pressure_cooking.htm

Guest Blog: My First Electric Pressure Cooker

Actually this is my second pressure cooker. The first one I ordered sat in the box until I finally sent it back – I was too scared to use it! The second one, the Cuisinart CPC-600, was a gift for Christmas. Couldn’t send that one back! So I read the directions that came with it. And read them again. Then read a ton of recipes. Then the directions again! And found a step-by-step video made by Cuisinart showing the pressure cooker being used. A friend said she would walk me through the first time cooking, and we picked a recipe to cook together. (On the phone, two states away!) She has been using her pressure cooker for over a year and has experimented with it a lot! It was Vikki‘s idea to have us guest blog as the Rookie and the Pro 🙂

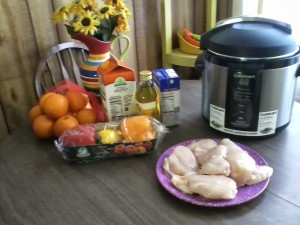
So here are all of my ingredients. I was so nervous!
Cuisinart CPC-600


The only picture I didn’t take was one of myself sitting on a stool on the other side of the kitchen after I started the pressure cooker! I was talking to my friend on the phone and I thought she would laugh herself silly. We chose a recipe from Comfortable Under Pressure by Meredith Laurence – aka The Blue Jean Chef. (If you have her cookbook, the recipe is on page 62.) I think having a good step-by-step recipe to follow really helped. Meredith’s book is the only one I have read so far because it came so highly recommended by my friend.

I have wanted a pressure cooker for a very long time. It has been getting to the point that I don’t want to cook after work, so the idea of being able to put a meal on the table so quickly was very appealing. All of the cooking shows I watch (and yes, the shopping channels!) make it look so easy to use a pressure cooker. And the food looks so good and the meat looks so tender! I went back and forth forever trying to decide yes or no and if yes, which one did I want. I would send Vikki links, etc. – what do you think of this one or that one. Never did make up my mind so Vikki and her brother did it for me! (Yes, the gifted pressure cooker was from them!)

My prep work doesn’t normally look this pretty,
but I knew I would be taking pictures 🙂


So. It was way, way easier than I thought it was going to be. It actually took me longer to prep the food than it did to cook it! One thing I did learn was patience. When it says in the directions that time varies for the cooker to reach pressure, it means it can vary! I thought I had done something wrong because it was making a noise but it wasn’t starting. I knew the lid was secure as I had checked at least three times. But the timer sat at 8 minutes and was not moving. On the phone my friend kept saying, “Just wait! Give it time, it has to reach that high temp”.  And of course she was laughing at me! I am sure all you other pros are laughing, too.  🙂

Vikki can tell you all the technical stuff about pressure cookers. For me, most pressure cookers I have looked at all look the same and do pretty much the same things. Some just pressure cook. Some also brown and sauté as well. In my opinion, if you are going to invest in a machine, the more things it can do the better! (One setting that mine does not have is a medium temperature setting – only high and low.)

The browning and sauté settings serve two purposes. Beside the obvious, it starts raising the temperature of the machine. That lessens the time it takes to reach pressure once you go from browning mode to pressure mode. After the meat was browned, it was removed from the pot. The other ingredients were added, the chicken placed back in. Sealed the lid properly, pushed the buttons for temp and time, then walked away! It really was that simple. And not scary at all 🙂                          

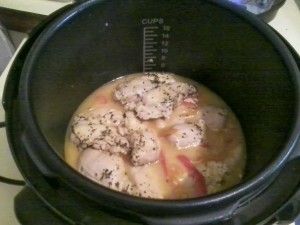
Everything is in the pot ready to go!


One thing I would highly recommend is a good cook book. Check a few out from the library before you decide which type works best for you. A beginner-type book with simple step-by-step instructions and pictures is what I needed! Some recipes will include the time for the machine reaching pressure along with the cooking time.

Get comfortable with the pressure cooker by using easy recipes to start with. Or don’t even start with a recipe – boil water, make rice, steam a vegetable. And play with it – take it apart, see which part goes where, practice putting the lid on and locking it. The instruction booklet that came with mine is fantastic! As well as very clear, concise directions, it also had a lot of recipes and charts of cooking times for meats, vegetables, etc.

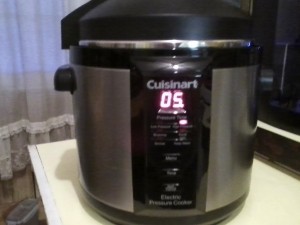
Watching the countdown from across the kitchen.


The Cuisinart is a highly recommended brand of pressure cooker. Replacement parts are easy to come by and it has been around for a long time. It is so very safe to use! You can not push any of the buttons to pressure cook unless the lid is secure. With all the stories of pressure cooker disasters, that was a very important aspect for me. And clean up is a breeze! The pot lifts right out (not heavy) and washes right up (non-stick). It is dishwasher safe, too, but even if I had a dishwasher I would baby it and hand wash it only. The sealing gasket is also removable for cleaning and when you need to replace it, as well.

And YOU were sooooo scared ……… LOL 🙂

 And Voila – the finished dish!
Boneless, skinless chicken breasts with oranges and peppers.
Cook time on high pressure: 8 minutes!

Next project: using the pressure cooker as a slow cooker! I just found a really simple recipe for corned beef and cabbage I might try!

Thank you, Vikki, for my pressure cooker (and Nick)! And thank you for inviting me to guest blog – although I can’t imagine who wants to read what I have to say LOL 🙂 It is going to be fun finding new ways to use my cooker and new things to cook! Let the adventure begin!

The Rookie aka Sue aka Vikki’s Mom